


Customizing 101: How to prep a vinyl figure to be customized!

If you are new to this column, it is truly meant to be read from the beginning to the most recent.
Please start with the first installment, "What are Designer Toys?"
For the next couple of months, the Designer Toys 101 column will be renamed "Customizing 101" as I tackle the single most requested topic: How do you make a custom designer toy? While there are a multitude of techniques and manners in which making a custom can be accomplished, I'll endeavor to thoroughly examine the basics with you.
The week's task is preparing your vinyl figure for customization. While many first timers will probably start by using a Munny or any other blank DIY figure, I'll go over what additional you'd need to do if your vinyl piece came painted (like a Dunny).
A lot of people like to start by drawing a guide sheet of what they want their completed custom to look like, typically done in scale to reference against the actual piece easily; I'm skipping this part but that doesn't mean it is any less valid… it actually means I have to keep this design a bit more fluid to accommodate any instructional elements I might've initially forgotten.
Goals: Take figure apart, remove the joint ridges, remove paint and give figure a bath.
Estimated time to achieve all goals: 1 hour.
Items needed for goals: Vinyl figure, hair dryer, x-acto knife, Acetone, paper towels (three to four sheets should do), dishwashing liquid and latex gloves.
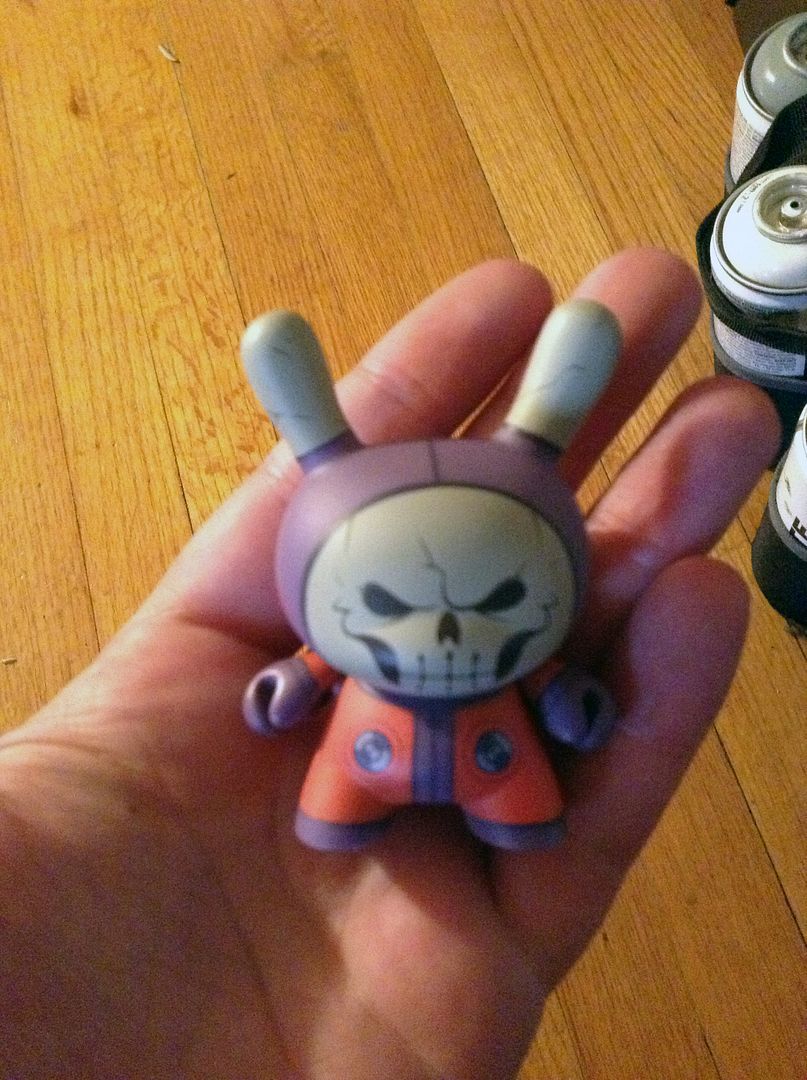 |
You'll start with a straight out of the box (or wherever you got it) vinyl figure. It's obviously far easier to use a blank DIY figure which is meant to be customized, but I'm using a production Dunny to reveal the additional steps required to do one of these. With just a little force try to separate the jointed parts, which in the case of this three inch Dunny are the head and both arms; if they pop off, easily, then you can skip the next couple of steps. Otherwise… |
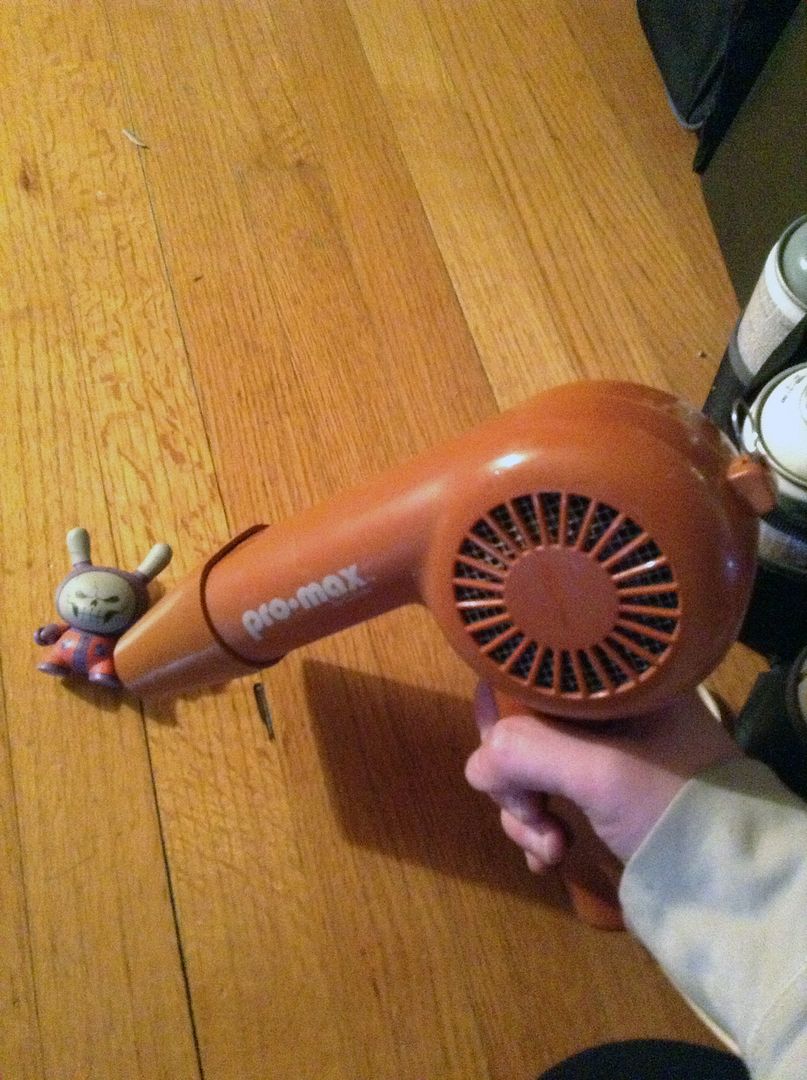 |
Get out the hair dryer. Turn it on, aiming it directly at the jointed areas. This will soften up the vinyl and make it easy to pull apart. Be very careful not to heat it up too much or you might malform the vinyl. |
 |
It is important to keep rotating the vinyl around the heat, not letting one area become exposed for an overly long period of time. Every once in a while, stop the the hair dryer and test if the jointed areas pop off. If not, use more heat. |
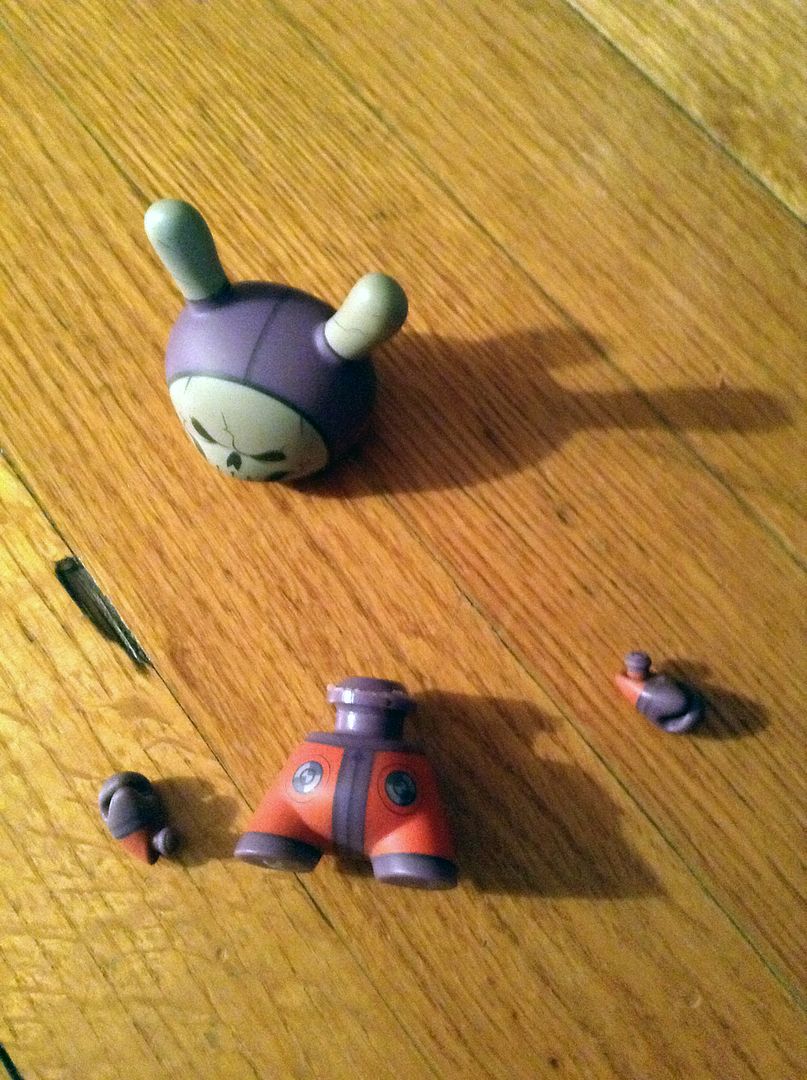 |
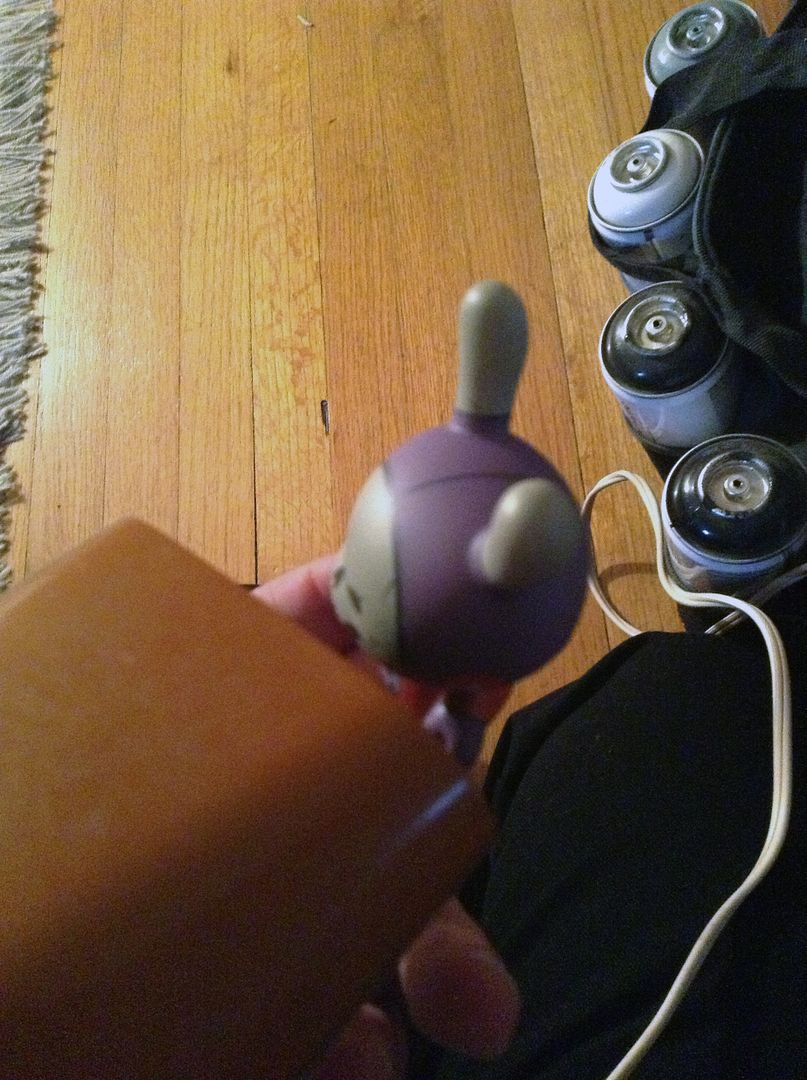
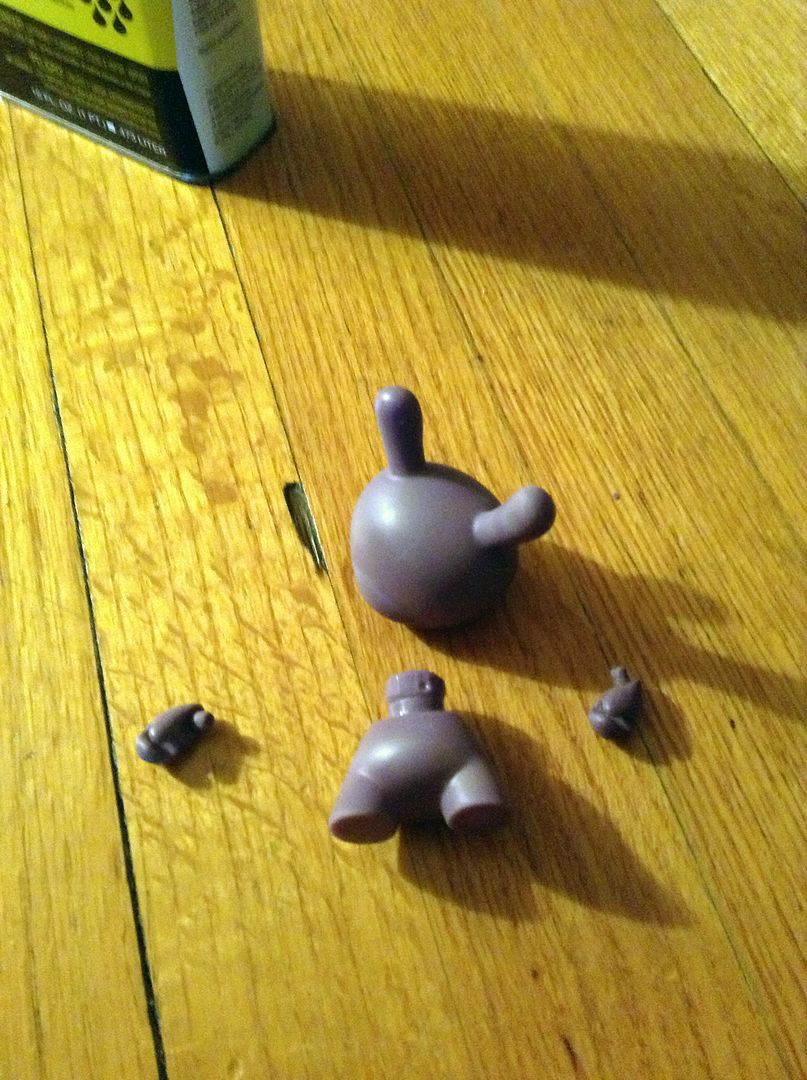
Once you've been able to pull all the jointed areas off, you should have something that looks like this. Assuming you used a hair dryer to pull it apart, wait until the vinyl has cooled down and is not longer any softer then it originally was. Also if you needed to use a hair dryer to take it apart, if you tried to reassemble the pieces you'll notice that you can't without reheating it, which is obviously a problem… |
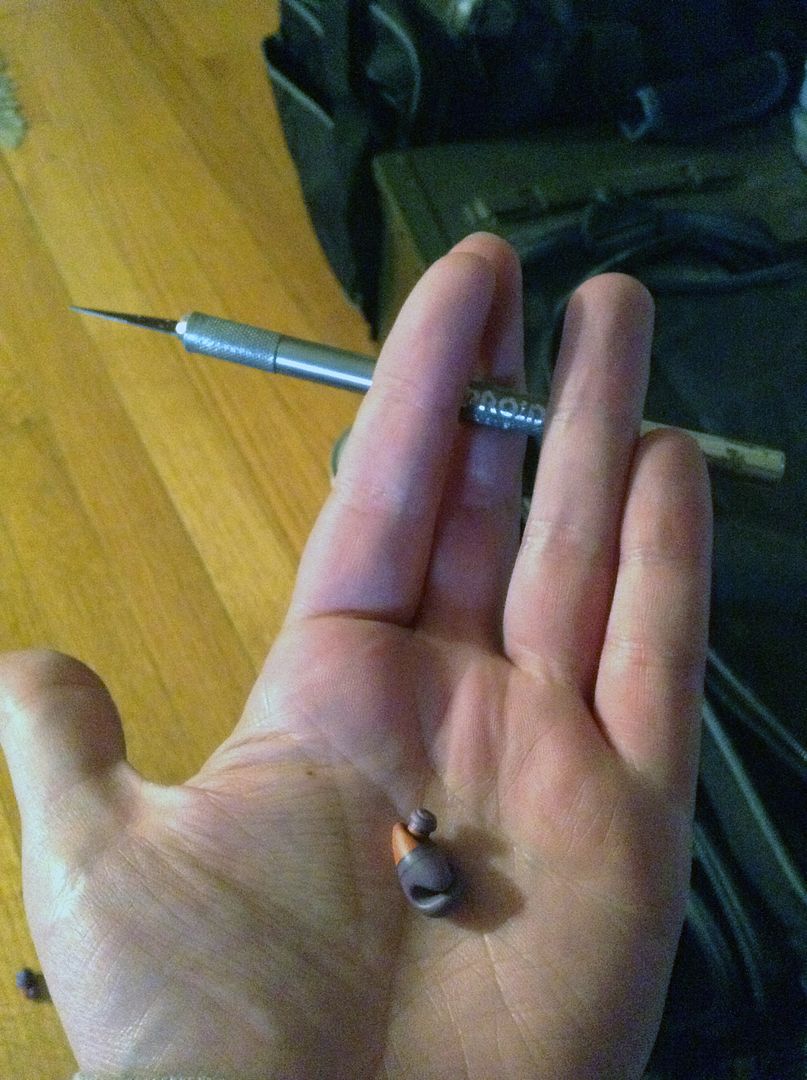 |
You can't put some pieces back together (usually some production pieces) due to these joint ridges, which are meant to keep the piece together. For our purposes, this is a problem. What you'll do is use the hair dryer to soften those ridges and carefully use the x-acto knife to shave the ridges down. |
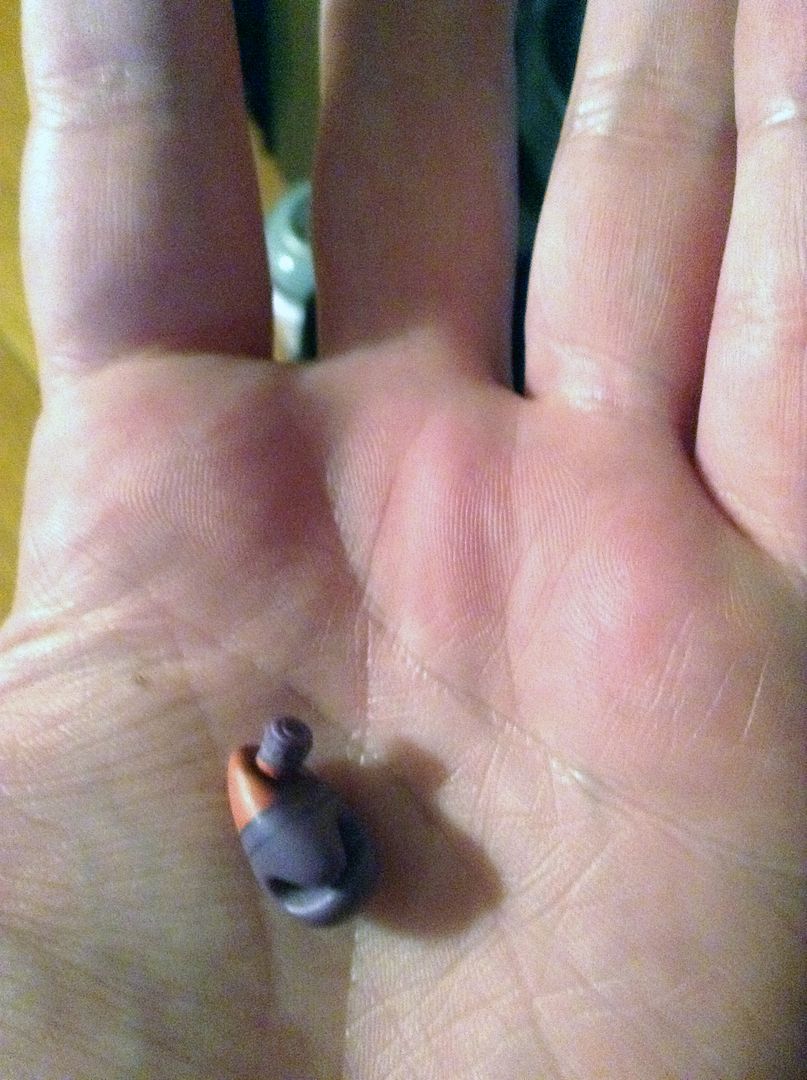 |
And this is what the arm looks like without the ridge. If you try to place the arm in the socket now, it should slide right in and out, though still have a little bit of tightness that will keep it in the socket unless tugged on. Learning how much of the ridge to remove is more of an experience matter; the more you do it, the better you'll grasp exactly what it should look like. |
 |
Now go and take off all the ridges, including the one at the neck joint in my example figure. Once they are all removed, you should have something like this. How do you know you've done it correctly? |
 |
You should be able to put the piece back together and take it apart again without use of the hair dryer now. If this is not the case, then you'll need to shave the ridges down a bit more. Take your time and keep trying; you can always shave a bit more off, but you can't put any back on. |
 |
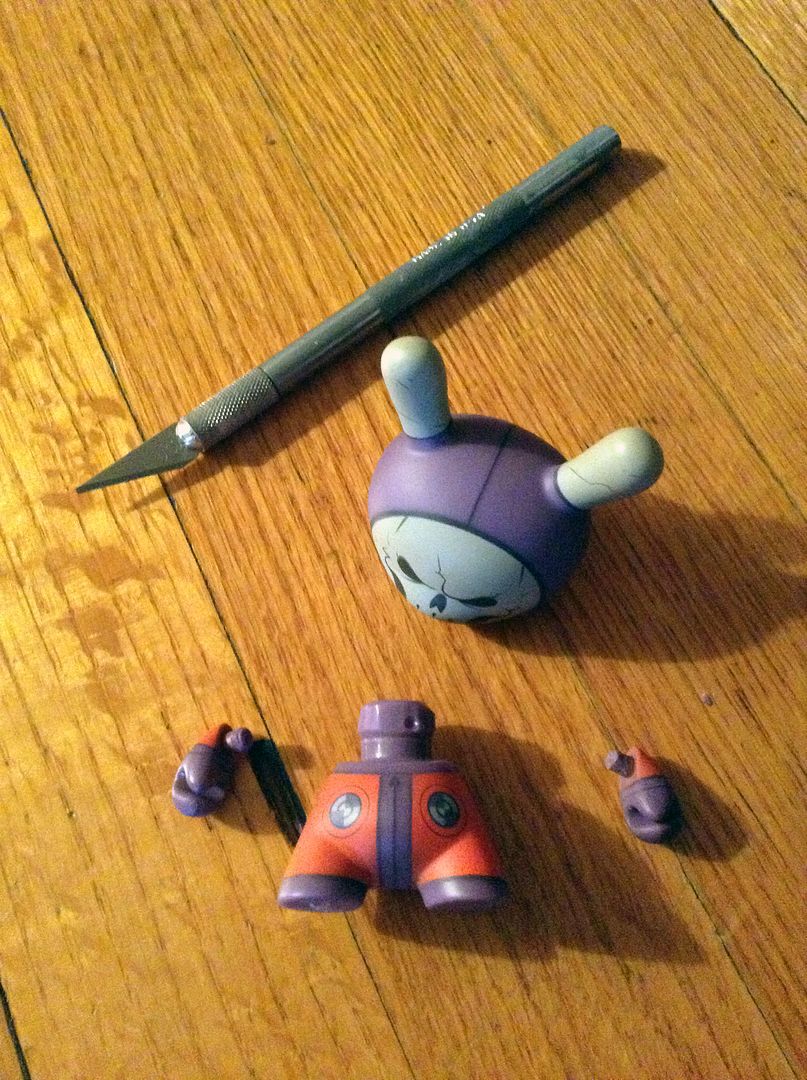
Now you'll want to take off the production paint job, assuming you don't have a blank DIY figure. For stripping all the paint off, we'll need some Acetone as well as a paper towel. Just put a little Acetone on the paper towel and start rubbing the painted areas. |
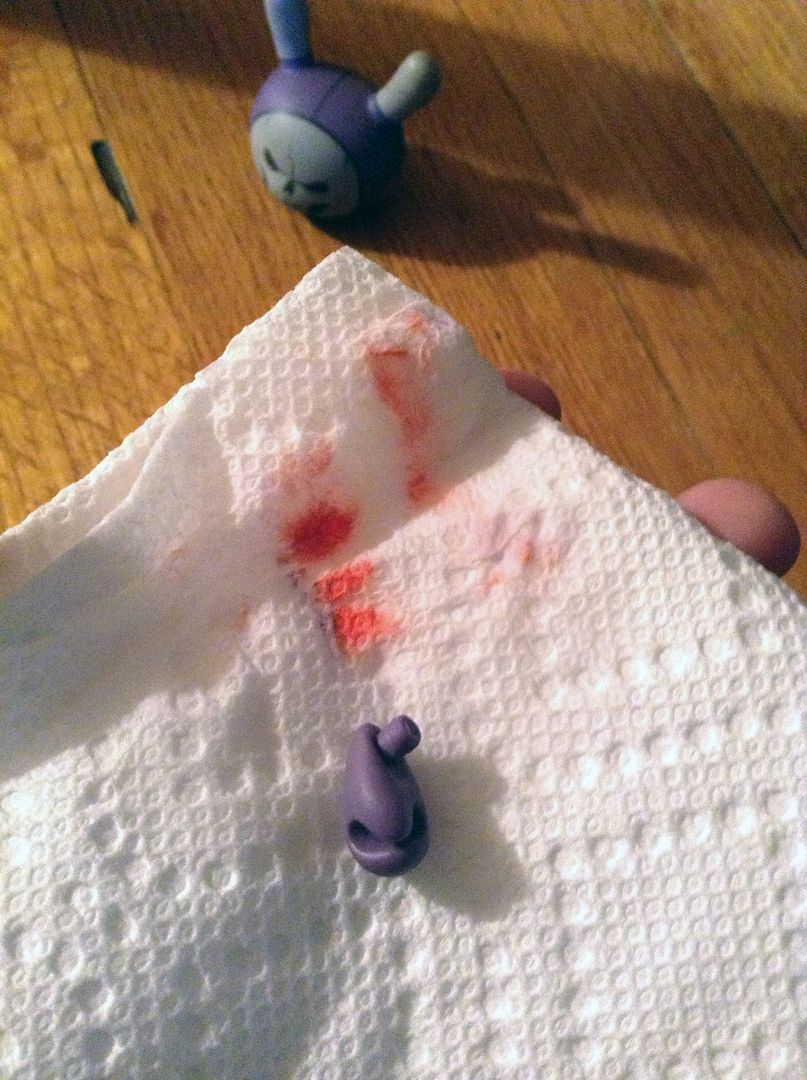 |
Yea, it's really that easy to take off paint with Acetone. But please be careful with it… as logic should tell you, anything that peels paint off this easily can be dangerous. Make sure you thoroughly wash your hands after using Acetone before doing anything else. |
 |
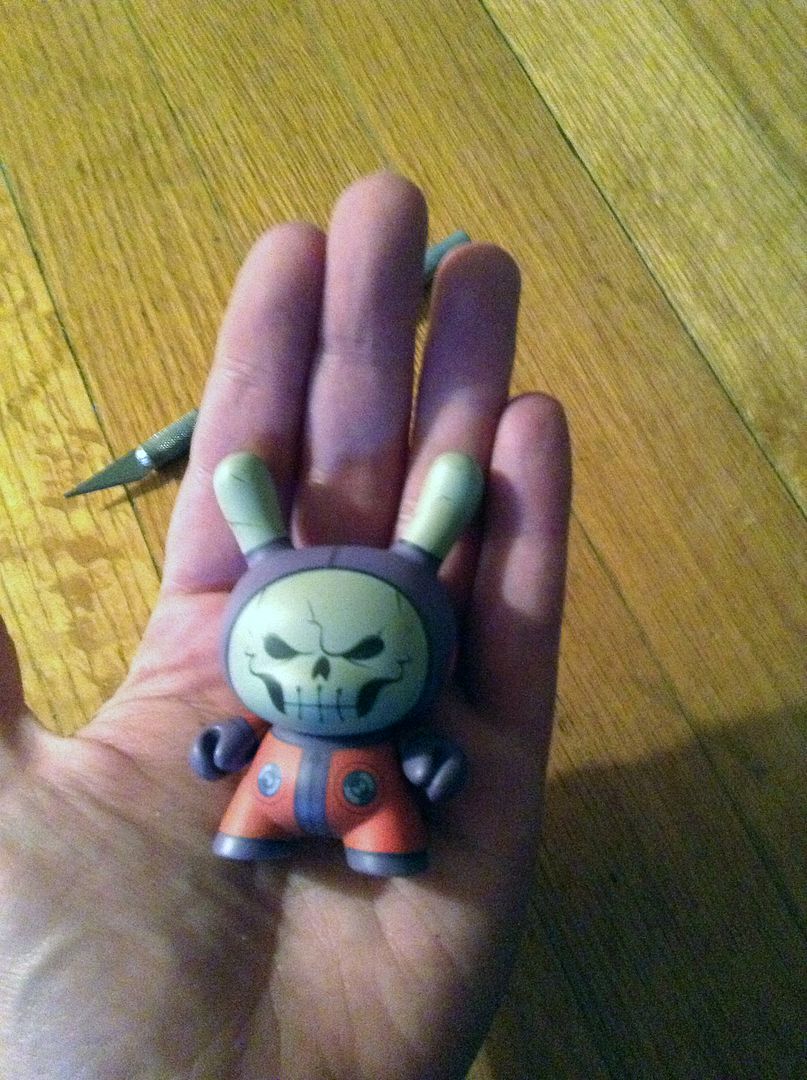
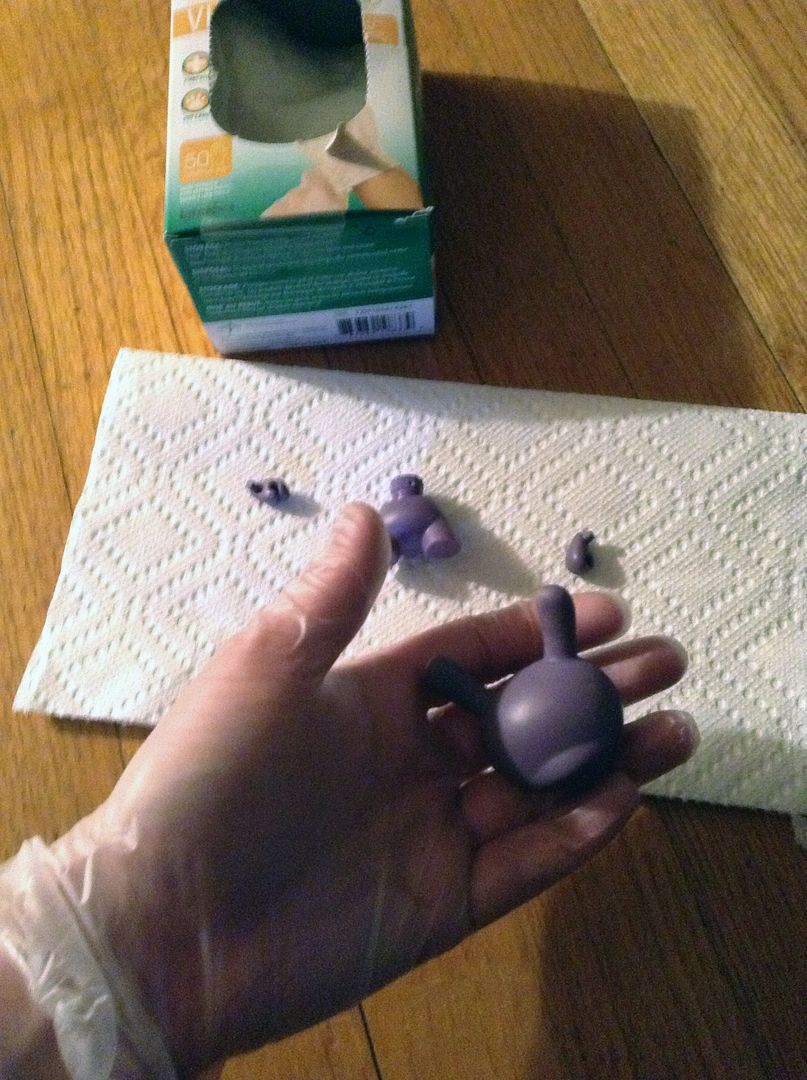
After about 10 minutes of work, we have a completely paint free Dunny. As you can see, my Dunny happened to be cast in purple vinyl. |
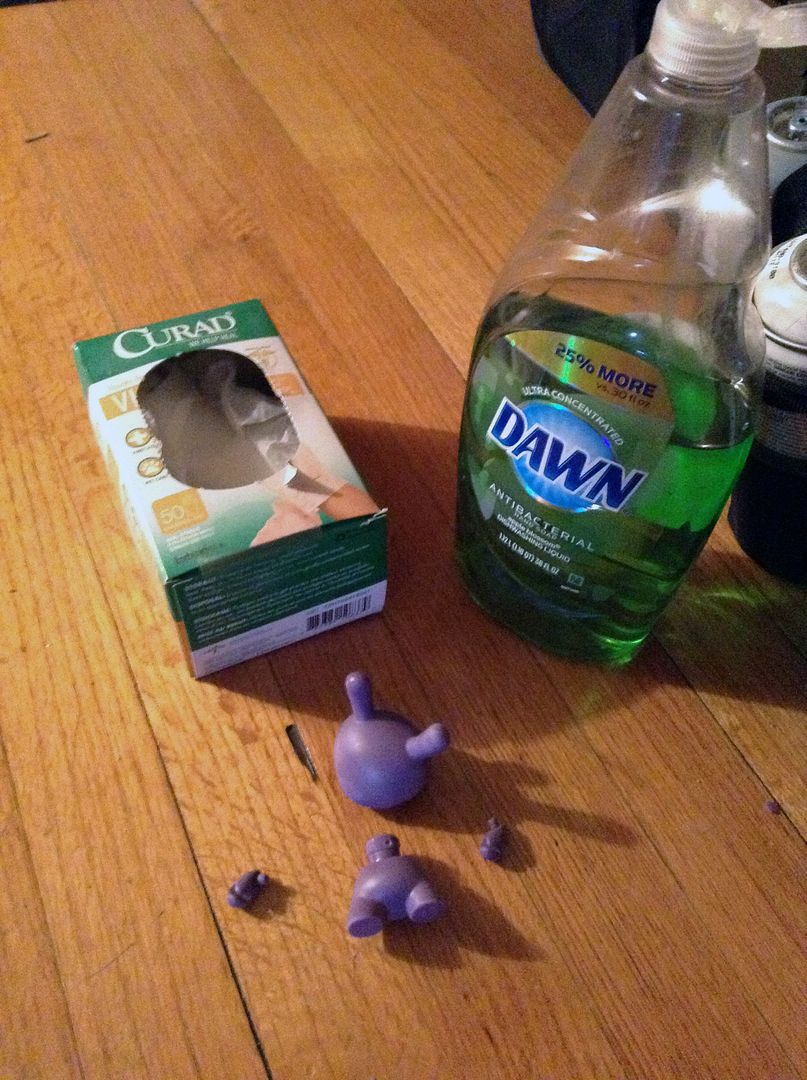 |
Now, regardless of whether you have a blank DIY or a production piece you've stripped, you need to give your vinyl figure a bath. For this final stage of prep, you'll need some dishwashing liquid, latex gloves and (not pictured) paper towels. |
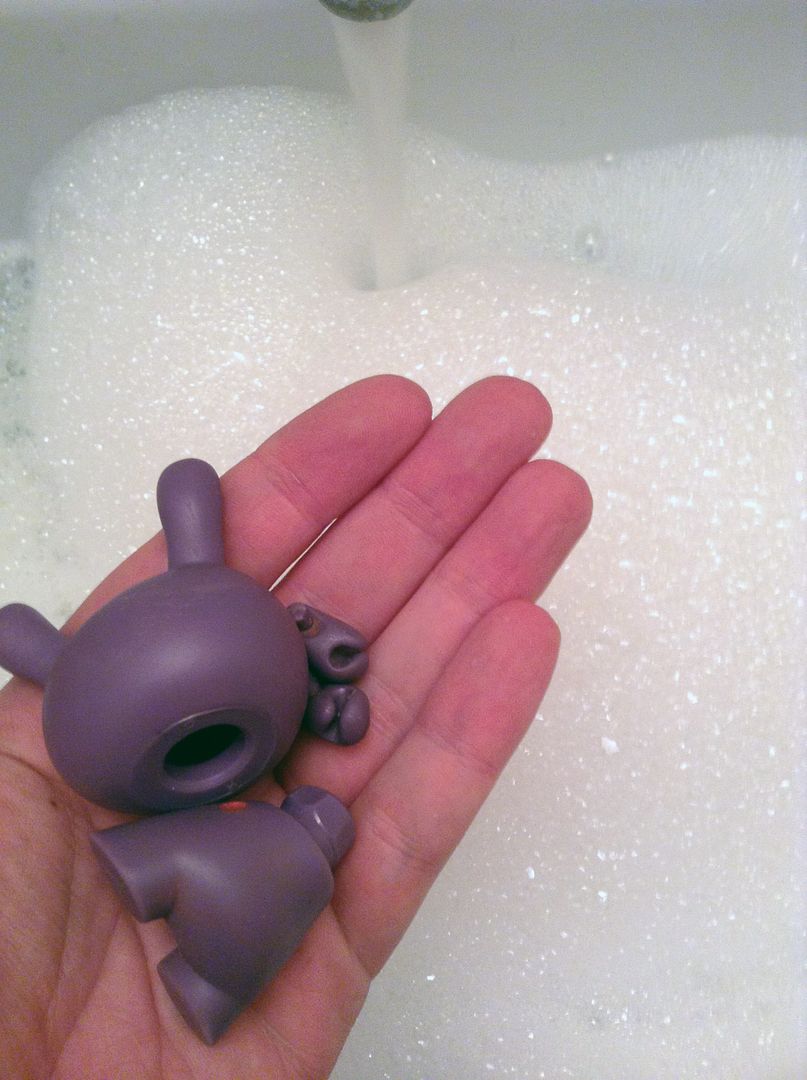 |
Fill up your sink or a tub with warm water and a couple of squeezes of dishwashing liquid. Your figure is ready for a bath! Why is this important? You want to remove all chemicals from the piece; not just the remainder of any Acetone, but anything that might still be on it from the factory too. As well as any oils from your hands that have transferred. |
 |
Put on the latex gloves and scrub your vinyl figure in the soapy water. Then wash it off and place it on a paper towel to drive. In fact, you should dry it with paper towel and then place it on another paper towel. At no point from here on out should you touch the blank figure with your bare hands, or else you might transfer more oils back on it (which can interfere with paints properly drying during customization). |
 |
And now you just put the freshly clean vinyl figure out to dry. It should be bone dry within the next half hour or so, which is when you can move on to the next stage of customization… |
Next Week: How to prime your vinyl figure.


No comments
Post a Comment